


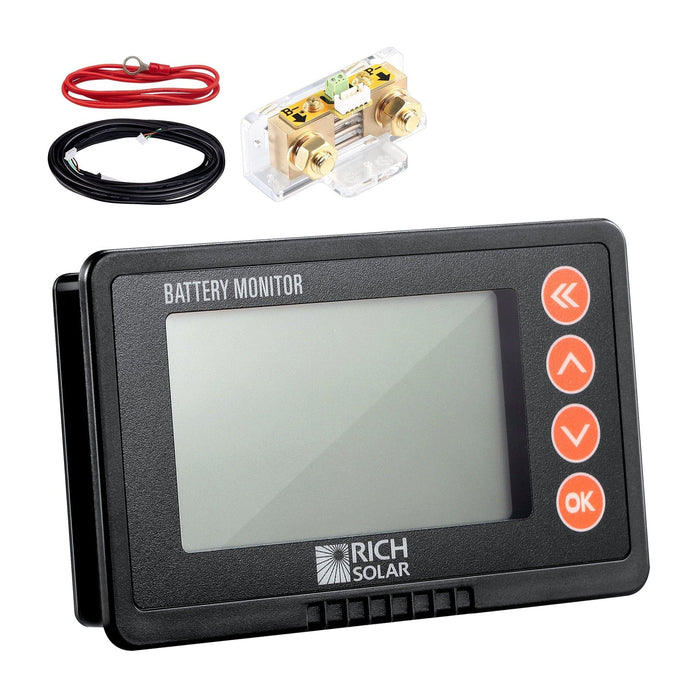
Rich Solar | 500 Amp Battery Monitor with Shunt | 8~120V 500A Battery Monitor with Shunt | Accurate Battery Status Monitor
Precise Battery Monitoring for Any System
Easily track your battery’s performance with the 500 Amp Battery Monitor with Shunt. Designed for systems ranging from 8V to 120V, this monitor provides accurate, real-time data on your battery’s status—including voltage, current, and state of charge. Ideal for solar systems, RVs, boats, and backup battery applications.
Installation and Wiring – Overview
The RS-BM500 shunt should be mounted as close to the battery as possible to ensure accuracy. The remote display is designed for easy wall mounting and allows convenient access to system performance at a glance.
Recommended Tools
-
Wrench
-
Drill
-
Jigsaw
-
2 appropriately sized ring terminals for battery cable
-
Crimp tool for ring terminals
Wiring Diagram
The following wiring diagram will be referenced in the next section.

Installation
- Before doing anything, disconnect all wires from the negative side of the battery.
- Cut the negative cable for the battery and crimp on new ring terminals. Alternatively, use a new wire of appropriate gauge to carry the full current demand of your system.
- Install the shunt as shown in the wiring diagram above. Note: The negative terminal of the battery must connect directly to the“B-" side of the shunt, and there should be no other connections to the negative terminal of the battery for accurate measurements.
- Use the B+ wire included in the package to connect the B+ terminal of the shunt to the positive side of the battery. Note: Do not stack smaller terminals under large ones.
- Connect the shunt to the remote display using the included shielded cable.
Mounting the Remote Display
- Plan the location of your remote display and keep in mind there is a cable that needs to route all the way to the shunt.
- Drill a hole in the center of the planned location and use the jig saw to cut a hole according to the following picture.
- Connect the shielded cable to the shunt and route it such that you can bring it through the hole.
- Connect the shielded cable to the remote and snap the remote into place.

Basic Setup
- Hold the "Ok" button for 3 seconds to enter the settings screen. The up and down arrows are used to navigate as well as change parameters. The "Ok" and "<<" button are used to enter and exit a setting.
- Set the "CAP" setting to match the capacity of your battery or battery bank.
- Optionally set the "HIGH V" and "LOW V" values to the voltages at which you want remaining capacity/percentage to reset to 100% and 0% respectively.
- Alarm is the minimum Ah value that will trigger an audible alarm.
- Once all of these settings are complete, hit "<<" and your BMK is set up.
Specifications
- Model: RS-BM500
- Battery Voltage Range: 8-120V
- Working Dissipation: 10mA
- Standby Dissipation: 1mA
- Capacity Accuracy: ±1.0%
- Voltage Accuracy: ±1.0%
- Current Accuracy: ±1.0%
- Backlight On Current: 80mA
- Capacity Setting Value: 0-500A
- Current Range: 0.1-9999Ah
Manuals and Downloads
Are Solar Guys Pro Authorized Retailers?
Yes! We are proud to be one of the few online retailers who are authorized retailers for every single product we carry!
Being an authorized retailer means we carry the same warranty as the manufacturer, protecting your purchase!
When Will My Order Ship?
Most orders ship within 1–3 business days. You’ll get a tracking number as soon as it ships via email!
Do We Accept Returns?
Yes absolutely, we have a no-hassle, 30-day return policy on all items! To refer to the full policy, click HERE
Are Products Brand New?
Yes! By default, all products on Solar Guys Pro are 100% brand-new and in perfect condition.
If an item is used or refurbished, it will clearly indicate so in the title of the product as well as the discription.
For example, a used Battery will say:
XYZ Battery | 48V 100AH (REFURBISHED)
If you'd like to confirm, you can always send us a email at info@solarguyspro.com

Orders over $500 include a FREE (Normally $149.99) 80-Page DIY Solar eBook — added automatically at checkout.
Frequently Asked Questions

Get your 30% Tax Solar Credit!
Unlock substantial savings with the government's Solar Tax Credit, which offers a robust 30% deduction on the installation costs of solar systems. This attractive incentive is your ticket to leveraging solar energy's eco-friendly potential while enjoying the financial benefits.
At Solar Guys Pro, our commitment is to you. Please be reminded that our expertise does not extend to tax advice. Nonetheless, our dedicated staff is eager to guide you through the process and ensure you capitalize on this exceptional offer.
Contact us now to learn more!